IMPORTUNA · SEXTELATA · EXIMIA
18 °C Declining
The sowing marker in autumn is measured in air under the tunnel, at the hottest time of the day, at 10 cm above the ground.
Observe the temperature decrease before triggering sowing.
 Ceramyca
CHAPTER 14 / 23
All chaptersChoose a planting window, fill the PODs gently and set them at the right depth in the growing bed.
Prepare the beds and their water supply before opening mycelium bags. Two markers guide the installation: the temperature signal and a soil already soaked well.
IMPORTUNA · SEXTELATA · EXIMIA
The sowing marker in autumn is measured in air under the tunnel, at the hottest time of the day, at 10 cm above the ground.
Observe the temperature decrease before triggering sowing.
BEFORE YOU POSE THE PODs
Carry out thesaturation watering before sowing. The PODs will then moisten in contact with the earth, by capillaryness.
Prepare the wateringThe case of Rufobrunnea. sowing are made on the first day of summer. Its timing is distinct from that of the species sown in autumn.
Smite the mycelium vigorously before opening its bag.
Give each POD a generous garnish, without compressing the mycelium, and then put the lid back on.
Prepare the slots on the bed and place the PODs low enough to cover their lid. Get in the alleys.
Bring 2 to 3 cm of soil over the lid. Restore the bed surface, without forming a mound on each POD.
Install the low protections for incubation and continue monitoring of moisture.
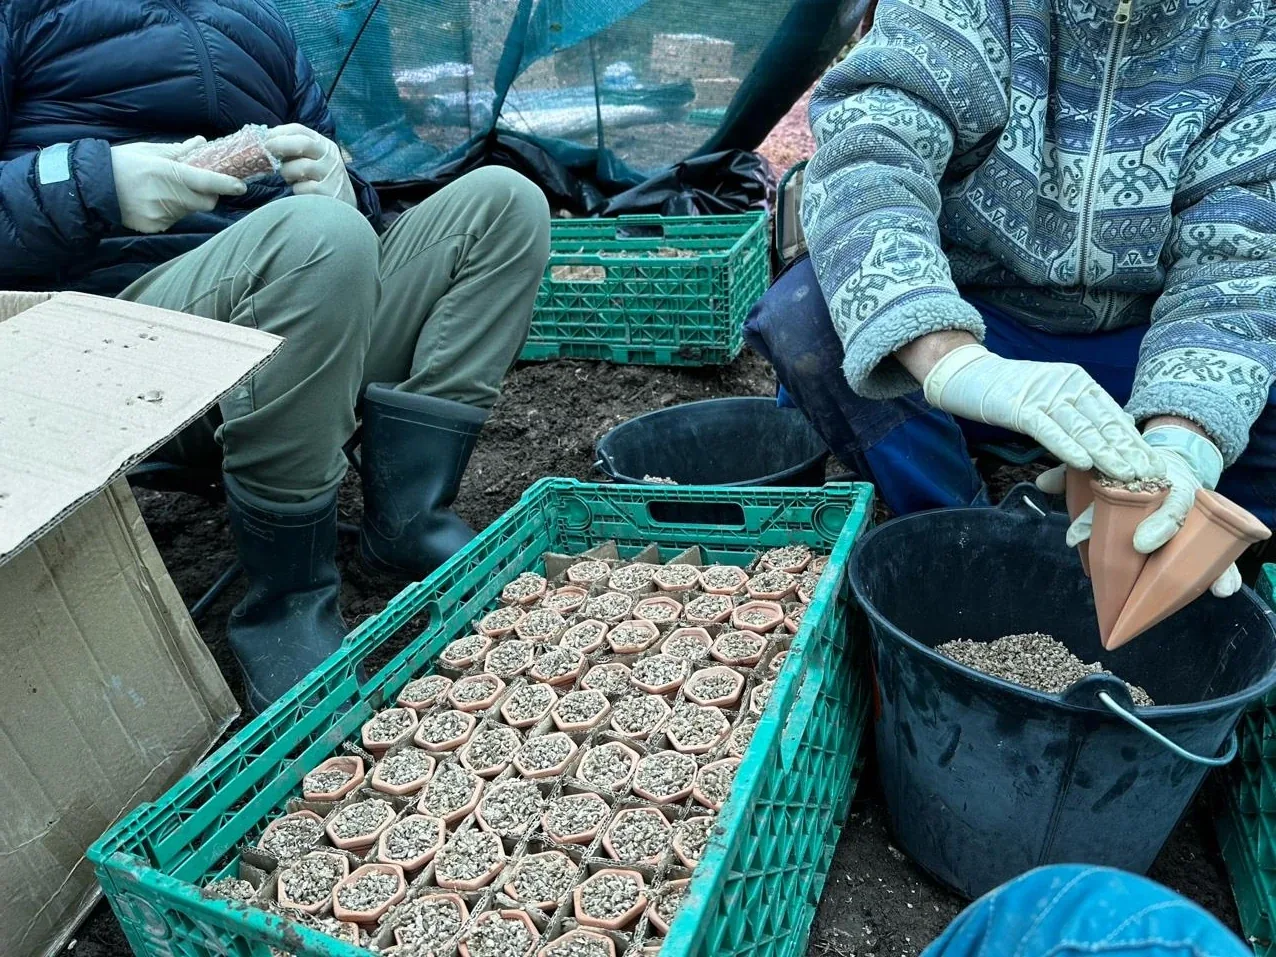
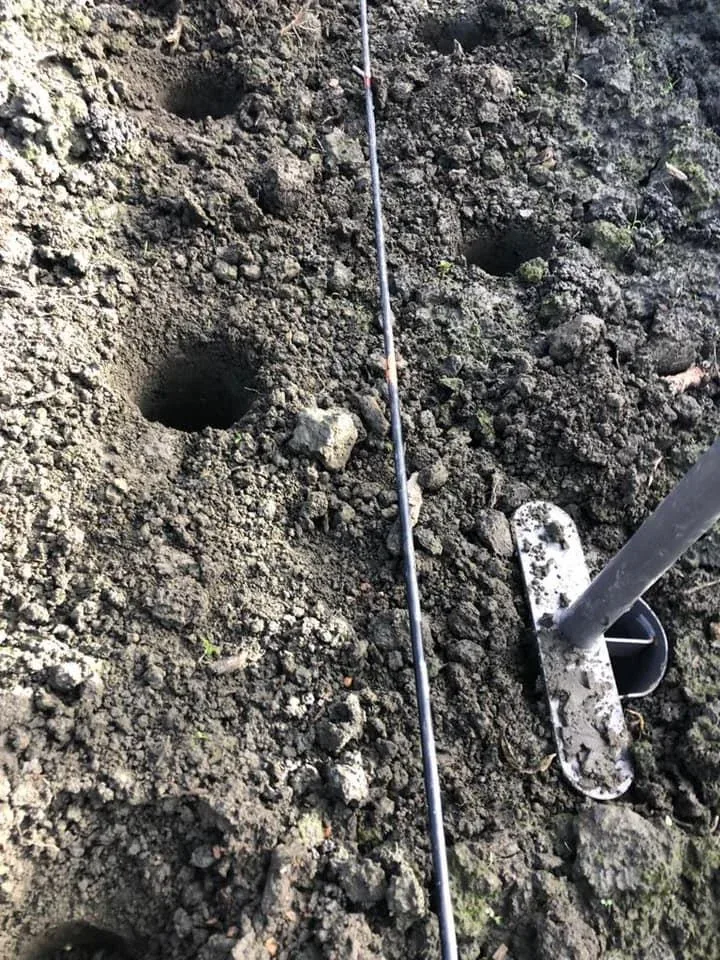
Measure the earth cover from the lid to the surface of the bed. The entire POD remains buried. After covering, the surface is continuous and levelled: adding a mound on a POD too high does not correct its depth of laying.
2 to 3 cm above the lid. The surface of the bed remains flat.
A POD too high. Adding a mound does not replace adequate burial.
Declare the PODs from one line to the other. The 50 cm are read on the same line; the 40 cm are read diagonally between two neighbouring PODs. The aisles are used to intervene without trampling the bed.
IDENTIFICATIONS
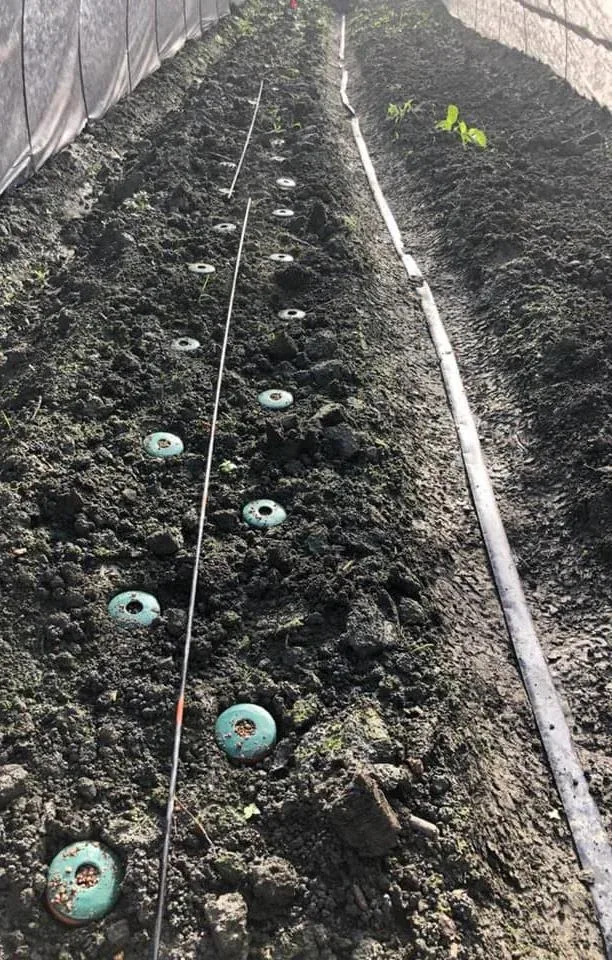
Staggering the PODs brings their advancing mycelium closer together. Where the growth fronts meet, sclerotia tend to form.
This organization also facilitates the connection of an exogenous nutrition bag to two PRO PODs, once mycelium is developed.
The commercial Flexible greenhouse example has three beds and about 400 PODs across 100 m² of growing area.
View the floor plan of the Flexible greenhouseOnce PODs are covered, the culture enters into incubation. Keep the protections provided and adjust water intakes to the stage of development.
Mycelium may develop underground before being visible. Follow its evolution, humidity and temperature.
Read the first signsThe connection is made after 7 to 15 days, when the spreading patches reaches 10 cm in diameter. Observe each point of culture before laying.
Know when to connect the bagsGESTES IN VIDEO
Install PODs and connect nutritionWatch on Facebook